

The Homeowner's Guide to Wind Damage: From Emergency Roof Repair to Lasting Reinforcement
You know the sound. That low moan of the wind that builds into a roar, rattling the windows and making you wonder if that big gust was the one. When the storm finally passes, a different kind of anxiety sets in. You walk outside, look up, and your stomach drops. A few shingles are flipped up. Maybe a piece of flashing is bent awkwardly.
That moment is unsettling. Your home is your sanctuary, and now its primary shield is compromised. What do you do first? Who do you call? And the big one: how much is this going to cost?
Look, we get it. As a family-owned roofing company in the heart of the Pacific Northwest, we've seen what our region's powerful windstorms can do. We're Robert and Bob, a father-son team, and we've spent over 30 years helping homeowners in Snohomish, Skagit, and King Counties navigate this exact situation. This isn't just about fixing a roof; it's about restoring your peace of mind.
This guide is designed to be your calm, clear-headed advisor. We'll walk you through exactly what to do, from the critical first steps to making sure your roof is stronger for the next storm.
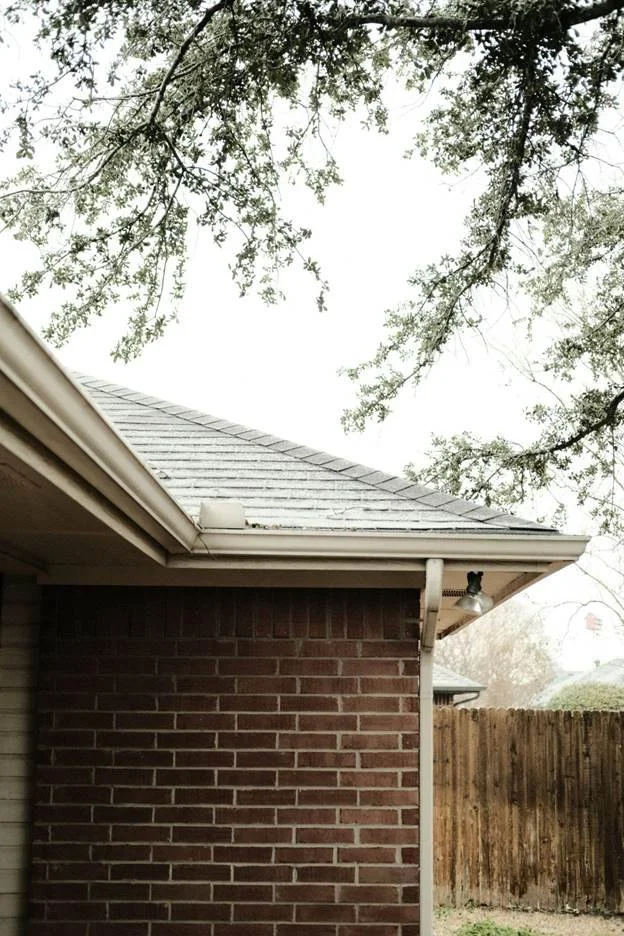
Table of Contents
Your Immediate Post-Storm Action Plan: What to Do in the Next 24 Hours
Choosing Your Repair Partner: How to Spot a Pro and Avoid a "Storm Chaser"
Beyond the Fix: How to Genuinely Reinforce Your Roof Against Future Winds
What Wind Actually Does to Your Roof: A Deeper Look
Understanding how wind damages your roof helps you spot problems others might miss. It's not just about brute force; it's about physics. When high-speed wind hits the edge of your roof, it creates a pressure difference—lower pressure on top, higher pressure underneath. This creates an upward lift, kind of like an airplane wing.
This is the force that does the real damage. And it usually shows up in three critical areas.
The Telltale Sign: Lifted and Missing Shingles
You see a shingle flapping in the breeze. What actually happened? The wind got underneath it and broke the asphalt sealant strip that bonds it to the shingle below. Once that seal is gone, the shingle is only held by its nails. Repeated lifting and flapping can loosen those nails, fatigue the shingle until it creases or tears, or rip it off entirely.
Asphalt Shingle Vulnerability: Most common, especially on older roofs where the sealant has become brittle. A single broken seal can create a chain reaction, allowing wind to get under adjacent shingles more easily.
Metal Roof Vulnerability: While highly wind-resistant, standing seam metal can suffer if a panel's edge fastener comes loose. This can allow wind to catch the entire panel, potentially peeling it back.
Flat Roof Vulnerability: On flat roofs, wind often attacks the perimeter, where the roofing membrane is secured. If this edge flashing fails, the wind can get under the membrane and cause large sections to bubble or "billow" up, sometimes tearing the material wide open.
The Silent Threat: Flashing Dislocation
Flashing is the metal work that seals the joints in your roof—around chimneys, skylights, vents, and where roof planes meet. It's a common failure point because it involves transitions between different materials. Wind doesn't just blow flashing off; it works it loose over time. Constant pressure and vibration can pry up the edges or break the sealant, creating a subtle but direct pathway for water to get into your home.
The Unseen Breach: Damaged Vents and Vent Caps
Those small caps and vents on your roof are essential for attic ventilation, but they are also vulnerable. Plastic vents can become brittle from sun exposure and crack under the stress of high winds. Metal caps can be dented by flying debris or simply lifted off their base if the fasteners fail. This is a particularly sneaky form of damage because a missing cap can allow gallons of rainwater to pour directly into your attic before you even notice a ceiling stain.
Your Immediate Post-Storm Action Plan: What to Do in the Next 24 Hours
Okay, the storm is over and you see or suspect damage. Don't panic. Follow a clear, methodical plan to protect your home and set yourself up for a smooth repair process.
Step 1: Safety First. Seriously.
Before you do anything else, assess the situation from the ground. Look for downed power lines, unstable tree limbs, or major structural damage. Do not climb on your roof. A wet, windy roof is incredibly dangerous, and you could easily cause more damage or suffer a serious fall.
Step 2: Document Everything (From the Ground)
This is your most important task for insurance purposes. Grab your smartphone and start taking pictures and videos.
Wide Shots: Get photos of each side of your house to show the overall context.
Zoom In: Capture specific areas of damage. See missing shingles? Get a clear shot. See a piece of flashing dangling? Document it.
Ground Debris: Take photos of any shingles, vent caps, or roofing material you find in your yard. This is undeniable proof of damage.
Step 3: Mitigate Further Damage (The Honest Truth About Tarping)
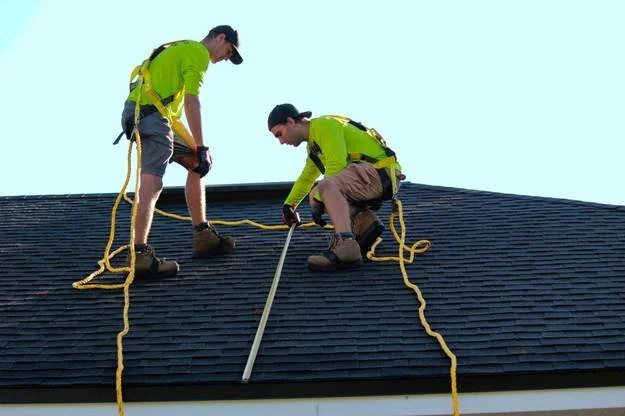
Your immediate goal is to prevent water from getting inside. A temporary tarp is the standard solution. Many homeowners consider doing this themselves, but honestly, it's a job best left to professionals. It involves getting on a potentially compromised roof, handling a large, unruly tarp in the wind, and securing it properly without causing more damage to your shingles.
If you have an active, severe leak, your priority is to call a professional for emergency tarping. While you wait, you can use buckets and towels inside to manage the water. If the damage appears minor and there's no sign of an active leak, you can proceed to the next steps, but keep a close eye on your interior ceilings and attic.
Step 4: Review Your Homeowner's Insurance Policy
Find your policy documents or log in to your provider's online portal. You're looking for a few key things:
Your deductible amount.
The type of coverage you have (we'll break this down next).
The specific phone number for filing a claim.
Doing this before you call gives you a huge advantage and helps you understand what to expect
Navigating the Insurance Maze: A Homeowner's Playbook
This is where most homeowners feel the most stress. The insurance process can feel confusing and intimidating. But it doesn't have to be. Understanding two key terms is half the battle. This is a critical distinction that competitors like Bill Ragan Roofing highlight, and it's essential for you to grasp.
ACV vs. RCV: The Two Most Important Acronyms You'll Learn
Think about it like this: your 10-year-old roof is like a 10-year-old car. It's still functional, but it has lost some of its original value due to age and wear. Insurance companies account for this depreciation.
Actual Cash Value (ACV): This policy pays you for the depreciated value of your damaged roof. It's the value of a 10-year-old roof, not a new one. This means you will have to pay the difference out-of-pocket to get a brand-new roof system.
Replacement Cost Value (RCV): This is the gold standard. This policy pays the full cost to replace your roof with new, similar materials. They typically pay this in two installments: first, they send you a check for the ACV. Then, once you've completed the repairs and provided proof, they "release the depreciation" and send you a second check for the remaining amount.
Knowing which policy you have is crucial for budgeting and setting expectations. An honest roofer can help you understand your policy and ensure the insurance adjuster has accounted for everything needed to do the job right. Learn more about our approach to residential roofing.
The Claims Process, Simplified
Initial Call: Contact your insurance company to open a claim. Give them the date of the storm and a general description of the damage you documented. They will assign you a claim number.
The Adjuster's Visit: An adjuster will schedule a time to come inspect the roof. It is highly recommended to have your chosen roofing contractor present for this inspection. Your roofer acts as your advocate, ensuring the adjuster sees all the damage—not just the obvious spots—and that the scope of work is accurate for a proper, code-compliant repair.
Review the Scope of Work: The adjuster will create a report detailing the damage and the estimated cost of repair. Review this document carefully with your roofer. Sometimes things get missed—like replacing felt underlayment, ice and water shield, or specific flashing. A good roofer will help you file a "supplement" to the claim to cover these necessary items.
Repair and Final Payment: Once the scope and cost are approved, the repair work begins. After completion, your roofer will send a final invoice to the insurance company, which triggers the release of the final payment (the depreciation, if you have an RCV policy).
Choosing Your Repair Partner: How to Spot a Pro and Avoid a "Storm Chaser"
After a big storm, you'll see an influx of trucks and door-knockers. Some are legitimate, but many are out-of-town "storm chasers" looking to make a quick buck on shoddy repairs before disappearing. Your choice of contractor is the single most important factor in the long-term success of your repair.
Here's your checklist for finding a true professional.
What to Look For (The Green Flags)
What to Avoid (The Red Flags)
Local and Established: They have a physical address in the community and a history of working in your area (like our Lake Stevens base).
Out-of-State Plates: A big sign they just rolled into town for the storm.
Properly Licensed and Insured: They can immediately provide proof of liability insurance and state licensing. This protects you.
High-Pressure Sales Tactics: Pushing you to sign a contract on the spot or offering a "deal" that expires immediately.
Manufacturer Certifications: Credentials like being an Owens Corning Preferred Installer show they've been vetted by the best.
"We'll Cover Your Deductible": This sounds great, but it's often a sign of insurance fraud and cutting corners on your project.
Excellent Reviews and References: Look for detailed reviews on platforms like GuildQuality or Google that speak to their process.
Vague or Incomplete Quotes: A professional quote will detail the exact materials, labor, and scope of work.
Willing to Meet Your Adjuster: A confident contractor wants to be there to represent your best interests.
No Written Warranty: A reputable company stands behind their work with a clear warranty on both labor and materials.
Your roofer should be a partner, not just a vendor. They should communicate clearly, answer every question, and make you feel confident in the process.
The Big Question: Should You Repair or Replace Your Roof?
This is a decision that balances short-term cost with long-term value and security. The right answer depends on a few key factors.
Age of the Roof: If your asphalt shingle roof is over 15-20 years old, it's nearing the end of its intended lifespan. A major repair might just be a temporary patch on a system that's already failing. In this case, putting that repair money toward a full replacement is often the smarter financial move.
Extent of the Damage: If you're missing a few shingles in one isolated area, a targeted repair makes perfect sense. But if you have widespread lifting, creasing, or missing shingles across multiple sections of your roof, you've likely lost systemic integrity. Trying to patch dozens of spots can be less effective and sometimes almost as costly as a replacement. The industry often uses a 25-30% rule: if more than a quarter of your roof is damaged, replacement is usually the recommended path.
The "One Patch Too Many" Problem: Over time, repeated repairs can lead to a mismatched, checkerboard appearance. More importantly, it can be difficult to integrate new shingles with old, brittle ones, potentially creating new weak points for wind and water.
A trustworthy contractor will present you with both options, explaining the pros and cons of each for your specific situation. They'll give you a clear price for the roof repair and a separate one for a full roof replacement, allowing you to make an informed choice.
Beyond the Fix: How to Genuinely Reinforce Your Roof Against Future Winds
Getting your roof fixed is a relief. Making sure you don't have to go through this again is true peace of mind. This is where real craftsmanship comes in, moving beyond simple repair to proactive reinforcement. This is the expertise that competitors, especially the big, generic brands, often gloss over.
The Power of a Six-Nail Pattern: Standard installation for many shingles calls for four nails per shingle. However, most architectural shingles are designed to accommodate six nails. Using a six-nail, high-wind nailing pattern dramatically increases a shingle's resistance to wind uplift. It's a small detail that makes a huge difference and is standard practice for quality-focused roofers.
Upgrading Your Starter Strip: The first course of shingles along your eaves and rakes (the edges of the roof) is the most vulnerable to wind lift. Using a dedicated, high-quality starter strip with an enhanced sealant provides a powerful, wind-resistant foundation for the entire roof.
Reinforced Hip and Ridge Caps: The shingles that cover the peaks and hips of your roof take a beating from the wind. Using specific, thicker, and more aggressively sealed hip and ridge cap shingles prevents them from becoming the first point of failure in a storm.
Choosing Wind-Rated Materials: When replacing your roof, look at the wind warranty. For instance, Owens Corning Duration® Series Shingles come with a 130 MPH wind warranty thanks to their patented SureNail® Technology. Investing in a superior material can save you thousands in future repairs.
These are the kinds of details we obsess over. It's the difference between a roof that's just "fixed" and a roof that's truly fortified.
We're Here to Help You Weather the Storm
The wind and rain will come again—it's a simple fact of life here in Washington. But worrying about your roof doesn't have to be.
Whether you have a few lifted shingles or significant storm damage, the path forward starts with a clear, honest assessment from an expert you can trust. We're not storm chasers; we're your neighbors. We're committed to doing the job right with quality materials, transparent communication, and craftsmanship that stands the test of time.
Don't let a damaged roof add any more stress to your life. Schedule your free, no-obligation wind damage inspection today. We'll come out, provide a thorough assessment, help you understand your options, and give you the straightforward advice you need to protect your home.
Frequently Asked Questions About Wind Damage Repair
How much does wind damage roof repair cost?
Costs vary widely. A simple repair for a few missing shingles might cost a few hundred dollars. More extensive repairs involving flashing or larger sections could range from $1,000 to $3,000 or more. The final cost depends on the type of roofing material, the steepness of your roof, and the extent of the damage. A detailed inspection is the only way to get an accurate quote.
Will filing an insurance claim for wind damage make my rates go up?
Generally, claims for "Acts of God" like weather events do not cause an individual homeowner's rates to increase. However, if there are multiple major storms in a region, the insurance provider may raise rates for everyone in that area to cover their increased risk, regardless of whether you personally filed a claim.
Can I just use roofing cement or caulk to fix a lifted shingle myself?
While it might seem like a quick fix, this is generally a bad idea. Applying caulk to the surface of a shingle can block the roof's natural water-shedding pathways and trap moisture, leading to faster deterioration. It's a temporary patch that often fails and can make a professional repair more difficult and costly later on.
How quickly do I need to get my roof fixed after a windstorm?
As soon as possible. Even a single missing shingle exposes the underlayment to UV rays and rain, which can cause it to break down. This creates a pathway for water to rot the wood decking underneath, turning a small problem into a major, expensive one. Acting fast is key to minimizing long-term damage.